
The Ultimate Self-Tape Audition Guide: How to Sound Natural and Get Noticed!
Introduction
The Evolution of Auditions
The acting world has witnessed a significant transformation over the years, especially in how auditions are conducted. Gone are the days when auditions were exclusively in-person events. The digital age has introduced a more flexible and accessible method – the self-tape audition.
The Rise of Self-Tape Auditions
Auditions have come a long way from in-person meetings in cramped studios. Today, casting directors rely heavily on digital submissions, making self-tapes the norm rather than the exception. Self-tape auditions have become a staple in the industry, offering young actors the convenience of recording auditions from the comfort of their homes. This approach not only saves time but also opens doors to opportunities regardless of geographical boundaries.

Today, casting directors rely heavily on digital submissions, making self-tapes the norm rather than the exception.
Understanding Self-Tape Auditions
Definition and Purpose
A self-tape audition is simply a pre-recorded video submission where actors perform a given script (or sides). These can be one short scene, multiple scenes and can include songs and / or dance routines to learn for a project. It's an opportunity to showcase talent to casting directors without being physically present in the room.
The Advantages Over Traditional Auditions
Self-taping offers numerous advantages, such as
Flexibility in scheduling,
Ability to do multiple takes,
The comfort of performing in a familiar environment.
The biggest advantage of self-taping is that it can level the playing field for actors from different locations. You no longer have to live in New York City or Los Angeles to submit on major projects.
Essential Equipment for Self-Taping

Incorporating technology in your audition process is not just about following trends; it's about adapting to the industry's needs. Understanding the nuances of digital auditions and mastering them can set you apart in a crowded field. Selecting an appropriate space for your self-tape can significantly impact the quality of your audition. You need a quiet, well-lit area that allows you to perform without distractions.
Camera and Microphone Essentials
Sound quality is as important as your performance. This section delves into choosing the right microphone and managing room acoustics for clear, professional audio.
Microphone Choices
Different microphones serve different purposes, and the choice of microphone can significantly impact the quality of your self-tape auditions. Understanding the nuances of each type and selecting the right one for your specific needs can elevate your performance from good to exceptional. Whether you're working with the built-in microphone of your camera or smartphone or considering an investment in an external microphone, making an informed choice is crucial.
Built-in Microphones: Convenience Meets Challenge
Most cameras and smartphones come equipped with built-in microphones. While these offer the utmost convenience, they often fall short in capturing clear, professional-quality sound. Built-in microphones tend to pick up a lot of background noise and can make your voice sound distant or echoey, especially in less-than-ideal recording environments.
Pros:
No additional equipment needed, making it perfect for actors on a tight budget or those just starting.
Ideal for quick auditions or initial practice takes.
Cons:
Lower sound quality, with a higher likelihood of capturing ambient noises.
Less control over audio levels and directionality.
If you're limited to a built-in microphone, consider recording in a quiet, carpeted room to minimize echo and background noise. Additionally, speaking directly towards the microphone and maintaining a consistent distance can help improve sound quality.
External Microphones: Elevating Your Audio
Investing in an external microphone can dramatically improve the sound quality of your self-tape auditions. External mics are designed to capture a clearer, more precise sound and often come with features that allow you to adjust for different environments and speaking volumes. There are several types to choose from, each with its own advantages:
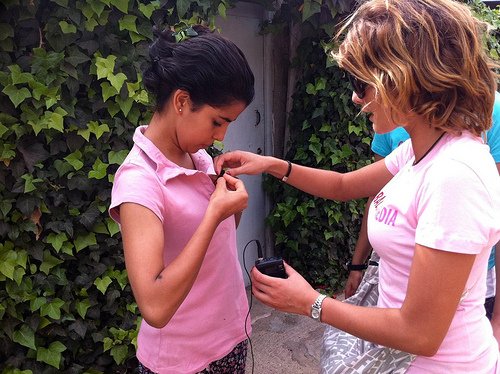
Lavalier mics are small clip-on mics that attach to clothing
1. Lavalier Microphones
Lavalier, or lapel, microphones are small, clip-on mics that attach to your clothing. They are excellent for self-tape auditions because they can be positioned close to your mouth, ensuring your voice is captured clearly and consistently, even if you move around.
Pros:
Discreet and hands-free, allowing for natural movement.
Captures consistent audio quality, even with head movement.
Cons:
Can pick up clothing rustle if not positioned correctly.
Limited by the length of the wire, unless you invest in a wireless system.

A shotgun style mic used for self-tape audtiions
2. Shotgun Microphones
Shotgun microphones are highly directional, designed to pick up sound from where they are pointed while minimizing background noise. They are ideal for controlled environments where you can set the microphone just out of the camera's frame, aimed directly at your mouth.
Pros:
Excellent at isolating the speaker's voice from background noise.
Flexible positioning options.
Cons:
Requires a stand or boom pole for optimal placement.
More expensive than other options.
3. USB Microphones
USB microphones offer a simple plug-and-play solution for actors. They can be connected directly to a computer, making them an excellent choice for home studios. These microphones vary greatly in quality and price but can offer superior sound for your self-tapes.
Pros:
Easy to use with direct computer connection.
Offers a range of quality options to fit various budgets.
Cons:
May require additional software for optimal use.
Less portable than lavalier or shotgun microphones.
Making the Right Choice
When choosing a microphone, consider your recording environment, the type of auditions you'll be filming, and your budget. At BKA, we have found the built in microphone to be the most common option that works for most submissions. A lavalier microphone might be the best choice for actors who move a lot in their performances, while a shotgun microphone could be ideal for those recording in a fixed position. If you're frequently editing your tapes on a computer, a USB microphone might be the most convenient option.
No matter which microphone you choose, remember that clear, high-quality sound can make a significant difference in how casting directors perceive your performance. Investing time and resources into the right microphone setup can be just as important as perfecting your monologue or scene. With the right equipment, you'll be able to deliver self-tape auditions that sound natural, professional, and, most importantly, get you noticed.
Controlling Room Acoustics
Room echo and background noise can be detrimental to your audition tape. Learn how to control your room's acoustics for the best sound quality.Quality matters. A good camera and microphone can make a significant difference in your self-tape. They don't have to be expensive, but they should be capable of capturing clear video and audio.
Camera Essentials for Self-Tape Auditions
The camera serves as the window through which casting directors view your talent. Its quality, settings, and how you position it can greatly influence the overall impression of your self-tape auditions. Whether you're using the latest DSLR or a smartphone, understanding how to maximize your equipment's capabilities is key to producing a self-tape that stands out.
Selecting Your Camera

Professional Camera vs. Smartphones- Which Should You Use?
Professional Equipment vs. Smartphones
While professional-grade cameras can offer superior video quality, they're not a prerequisite for a successful self-tape. Modern smartphones are equipped with high-quality cameras that can capture excellent video, often rivaling traditional cameras. The key is knowing how to use your device to its fullest potential.
Pros of Professional Cameras:
Higher resolution and better low-light performance.
More control over depth of field, allowing for a more cinematic look.
External microphone input for improved audio quality.
Pros of Smartphones:
Accessibility and ease of use.
Integrated software for quick editing and sharing.
Constant advancements in technology making smartphone cameras increasingly capable.
Regardless of your choice, ensure your device can record in at least 1080p resolution. High-definition video will make your self-tape look more professional and appealing to casting directors.
Framing and Angles
The composition of your shot—how you frame yourself within the camera's view—plays a significant role in the effectiveness of your self-tape. Here's how to make the most of it:
The Rule of Thirds

The Rule of Thirds is a simple trick to make your videos, photos, or drawings stand out: Imagine drawing two lines up and down, and two lines across your picture, so it looks like a tic-tac-toe board. That makes nine little squares and four lines where they meet. If you put the important parts of your picture on those lines or where they cross, your picture will usually look awesome.
Divide your frame into thirds, both horizontally and vertically, and position yourself so that your eyes are approximately along the top horizontal line. This technique creates a more engaging and aesthetically pleasing shot than centering yourself in the frame.
Medium Close-Up
For most self-tape auditions, a medium close-up shot (from the chest up) is ideal. It allows the viewer to see your facial expressions and gestures clearly without being too close or too far away. Ensure your eyes, the most expressive part of your face, are visible and well-lit.
Angles Matter
The camera angle should be at eye level to simulate a natural line of sight, as if the viewer were in the room with you. Avoid low or high angles unless specifically requested or if they serve a creative purpose in your audition piece.
Camera Setup Tips
Stabilize Your Camera: Always use a tripod or stable surface to prevent shaky footage. Stability is key to maintaining a professional look.
Mind the Background: Keep your background simple and uncluttered. A neutral backdrop ensures that the focus remains on you and your performance. Most actors use a blue or grey collapsible backdrop or put themselves in front of a plain wall. This is essential for all submissions.
Check Your Frame: Before recording, do a test shot to check your framing, background, and lighting. Ensure there are no distracting elements in the shot and that you're positioned correctly.
Test Your Setup: Record a short clip to test the sound and video quality. Make adjustments as needed to lighting, microphone placement, and camera settings.
By understanding and applying these camera essentials, you can significantly enhance the quality of your self-tape auditions. Remember, the goal is to present yourself in the best possible light, showcasing your acting skills without technical issues detracting from your performance. With the right approach to selecting and using your camera, you'll be able to create self-tapes that capture the attention of casting directors and help you get one step closer to landing the role.
Lighting and Background Considerations
Lighting is crucial in a self-tape. It should be bright enough to see your expressions clearly but not so harsh as to create shadows. The background should be neutral and clutter-free to avoid distractions.
Lighting: The Key to a Professional-Looking Self-Tape
Lighting plays a pivotal role in the quality and professionalism of your self-tape auditions. It's not just about making sure the viewer can see you; it's about crafting an environment that complements your performance, highlights your features, and conveys the mood or tone of the scene. Proper lighting can elevate your self-tape from amateur to professional, capturing the attention of casting directors and helping you stand out in a sea of auditions.
Understanding the Basics of Good Lighting
Good lighting does more than illuminate; it shapes and defines your space, creating depth and dimension that draw the viewer's eye to the most important element of the audition: you. Here are the fundamentals of effective lighting for self-tape auditions:
1. The Three-Point Lighting System
The three-point lighting system is a classic setup that consists of key light, fill light, and back light. This arrangement creates a balanced, flattering light that reduces harsh shadows and highlights your facial expressions—essential for conveying emotion in your performance.
Key Light: The main source of light, usually positioned to the side of the camera at a 45-degree angle, illuminating the side of your face. It should be the brightest of the three to ensure your features are well-defined.
Fill Light: Positioned on the opposite side of the key light, the fill light eliminates harsh shadows caused by the key light, providing a softer illumination. It's generally less intense than the key light to maintain depth.
Back Light: Placed behind you, the back light helps separate you from the background, adding depth to the shot and ensuring you're not blending into the scenery. It's a subtle touch that can significantly enhance the professional quality of your self-tape.
2. Natural Light as an Ally
Natural light, especially when diffused through a window on a cloudy day, can be a powerful and flattering lighting source for self-tape auditions. The soft, even light it provides can illuminate your space beautifully without the need for sophisticated equipment. However, relying on natural light means you're at the mercy of the weather and time of day, which can be limiting and inconsistent.
Tips for Optimizing Your Lighting Setup
To make the most of your lighting, whether you're using natural light, the three-point system, or a combination of both, consider these expert tips:
Avoid Mixed Lighting: Use light sources with the same color temperature to avoid an unnatural look. Mixing different types of light (e.g., natural light with warm indoor lights) can result in unflattering color casts on your skin.
Diffuse Your Light: Harsh light can create sharp shadows and highlight imperfections. Using diffusers, like white curtains over windows or lampshades on lights, can soften the light for a more flattering and professional look.
Consider the Background: Lighting isn't just about you; it's also about setting the right scene. Ensure your background is well-lit but not so bright that it distracts from your performance. A well-lit background can add depth and context to your self-tape.
Adjust Based on Feedback: Experiment with different lighting setups and angles to find what works best for you. Record test clips and review them or seek feedback from peers to identify areas for improvement.
Embracing Lighting as Your Audition Partner
Effective lighting is as crucial to your self-tape audition as your performance. It highlights your dedication to professionalism and your understanding of the visual aspect of storytelling. By mastering the art of lighting, you ensure that you're seen in the best light possible and demonstrate your ability to present yourself as a serious contender for any role. Remember, in the competitive acting world, every detail counts—lighting included.

Preparing for Your Audition: A Step-by-Step Guide to Success
An actor's preparation for a self-tape audition can significantly influence the outcome. It's not just about having the right equipment or knowing your angles; it's also about the groundwork you lay before you even press record. Choosing the right script and deeply understanding your character are foundational steps that set the stage for a compelling performance.
Choosing the Right Script
Selecting a script for your self-tape audition is a critical decision that can either showcase your strengths or leave your talents unnoticed. The right script acts as a bridge between you and the character, allowing you to demonstrate your acting range and emotional depth effectively.
Tips for Selecting a Script:
Align with the Character's Profile: Choose a script that closely aligns with the character's profile you're auditioning for. If the character is comedic, select a script that highlights your comedic timing. For dramatic roles, choose a scene that allows you to showcase emotional depth.
Showcase Your Strengths: Pick a script that matches your acting strengths. Whether it's your ability to deliver powerful monologues or your skill in portraying complex emotions, make sure the script gives you the space to shine.
Consider Length and Complexity: Your audition piece should be concise yet complex enough to demonstrate your range. A 1-2 minute monologue or scene is typically ideal, offering a snapshot of your capabilities without overstaying its welcome.
Understanding the Character
Delving deep into the character's psyche is what transforms a good performance into a great one. Understanding the character you're portraying requires research, imagination, and empathy.
Strategies for Character Analysis:
Research the Character's Background: Gather as much information as you can about the character's background, setting, and storyline. This context provides a foundation for your performance, informing your interpretation of the character's motives and emotions.
Analyze the Character's Motives: Ask yourself what drives the character. What do they want more than anything, and why? Understanding the character's objectives can help you infuse your performance with purpose and direction.
Explore the Character's Emotions: Consider the character's emotional journey throughout the scene. Identify key emotional beats and consider how these moments affect the character's behavior and speech. This emotional mapping will help you deliver a nuanced performance.
Practice Empathy: Put yourself in the character's shoes. How would you feel in their situation? Drawing on your own experiences and emotions can help you connect with the character on a deeper level, making your portrayal more authentic and compelling.
Bringing It All Together
Preparing for your audition by selecting the right script and understanding your character are steps that require time, thought, and creativity. These preparatory actions are not just about memorizing lines; they're about crafting a living, breathing persona that resonates with viewers.
By thoroughly analyzing your character and choosing a script that showcases your talents, you position yourself as a thoughtful, versatile actor capable of diving deep into a role. Remember, the goal of any audition is not just to perform but to transform—bringing characters to life in a way that captures the imagination of your audience. With careful preparation, you can turn your self-tape auditions into compelling narratives that leave a lasting impression on casting directors.
The Art of Acting for the Camera

Techniques for Engaging the Viewer
Captivating an audience through a screen requires a nuanced blend of emotional authenticity and technical skill. In self-tape auditions, where you have only a camera lens to connect with, mastering the art of engaging the viewer becomes even more crucial. Here's how to make your performance not just seen, but felt, by the casting directors.
Acting for the Camera: A Study in Subtlety
Unlike stage acting, where grand gestures and projection are necessary to reach the back row, camera acting thrives on subtlety and intimacy. The camera picks up every nuance of your performance, turning slight facial expressions and minute shifts in body language into powerful storytelling tools.
Focus On One or Multiple Focal Points to engage Your Scene Partner or Partners. Direct your lines, emotions, and reactions towards each character in the scene, just as you would with a live scene partner. If there is one character in the scene, place that person slightly to the side of the camera, as if they are sitting next to the camera. If there are more characters in the scene, find clear focal points for each of them. Think of a dog collar around your neck, you shouldn’t look too far to the side but keep each focal point as if they were a number on the clock in front of you. Avoid looking directly into the camera, unless the character is “breaking the fourth wall” in the scene or song. This creates a sense of direct engagement and intimacy with the viewer.
Convey Emotion Through Your Eyes: The eyes are often said to be the windows to the soul, and this is especially true in film and television. Make sure your emotions reach your eyes—whether it's joy, sorrow, anger, or fear. Let your gaze convey the depth of your character's feelings, drawing the viewer into the narrative. Make your scene more about engaging with, listening to and reacting to your scene partner vs. the scene just being about your lines. The connection and conversation with your scene partner is essential in on-camera acting.
Balancing Emotion and Technique: The Actor's Tightrope

Striking the right balance between genuine emotion and technical proficiency is a delicate art. Too much emphasis on technique can make your performance feel cold and detached, while an overabundance of raw emotion may come across as uncontrolled or overacted.
Harness Genuine Emotion: Tap into real feelings and experiences to bring authenticity to your performance. Use personal memories and emotions as a foundation, but remember to keep them under control. The goal is to be in the moment, fully embodying your character's emotional state without losing grip on the technical aspects of your performance.
Maintain Technical Proficiency: While emotional authenticity is key, maintaining an awareness of the technical elements—such as positioning for the camera, voice modulation, and timing—is essential. Practice your scenes enough so that technical considerations become second nature, allowing you to focus on the emotional truth of your performance.
Avoiding Overacting and Underperforming: Finding the sweet spot where emotion and technique intersect is crucial. Overacting, especially on camera, can distract from the story and undermine the believability of your character. Underperforming, on the other hand, may fail to capture the viewer's interest or convey the scene's emotional stakes. Aim for a performance that feels true to life, with emotions that are proportionate to the context of the scene. Most importantly: ground yourself and avoid swaying and unnecessary movements in your scene.
Engaging the Viewer: The Ultimate Goal
The ultimate aim of your self-tape audition is to forge a connection with the viewer, compelling them to believe in your character and your story. By focusing on subtlety and intimacy, balancing emotion with technique, and treating the camera as your confidant, you can create a captivating audition that stands out. Remember, in the end, it's about making the viewer feel something. Your ability to engage not just the eyes but the hearts of the casting directors can turn your self-tape from a mere audition into a memorable performance.
Audio Mastery: Sounding Natural
Voice Modulation Techniques
Your voice is a powerful tool. Learn to modulate it to convey the right emotions. Practice speaking clearly and at a natural pace.
Avoiding Common Audio Pitfalls
Audio quality is as crucial as video quality in self-tape auditions, yet it's often overlooked by actors focused on their visual performance. Poor audio can distract from your acting, making it hard for casting directors to focus on your performance. Here are key strategies to avoid common audio pitfalls, ensuring your voice is heard clearly and effectively.
1. Eliminate Background Noise
Background noise is one of the most common audio issues in self-tape auditions. From the hum of an air conditioner to traffic noise outside your window, unwanted sounds can compete with your voice, reducing the clarity and professionalism of your audition.
Solutions:
Choose a Quiet Location: Record in the quietest part of your home. Closets or rooms with lots of soft furnishings can help absorb sound.
Turn Off Noisy Appliances: Before recording, turn off any appliances or devices that produce background noise.
Use a Noise-Canceling Microphone: These microphones are designed to focus on your voice while minimizing ambient sounds.
2. Avoid Echo and Reverb
Echo and reverb occur when your voice bounces off hard surfaces, creating a hollow or distant sound. This can make your dialogue hard to understand and give your audition a less professional feel.
Solutions:
Soft Furnishings: Use carpets, curtains, and cushions to soften the room and absorb sound.
Record in Smaller Spaces: Large, empty rooms tend to produce more echo. Choose a smaller, well-furnished room for recording.
DIY Sound Panels: In a pinch, hanging blankets or placing pillows around the recording area can help reduce echo.
3. Ensure Clear Voice Recording
The clarity of your voice is paramount. A muffled or distorted voice recording can obscure your diction and emotional nuances, key components of your performance. This is especially useful for voiceover recordings.
Solutions:
Proper Microphone Placement: Position the microphone close enough to capture your voice clearly without picking up breathing or popping sounds. A lapel mic or a directional microphone on a stand can be positioned optimally.
Use a Pop Filter: If you're using a more sensitive microphone, a pop filter can reduce plosives—hard sounds that can cause a burst of air, leading to distortion.
Conduct Sound Checks: Always test your audio setup before recording your audition to adjust levels and ensure your voice is clear and at the right volume.
4. Match Audio and Video Quality
Discrepancies between audio and video quality can be jarring. High-quality video paired with poor audio (or vice versa) can detract from the overall impression of your audition.
Solutions:
Consistent Quality: Aim for both your audio and video to be of high quality. Don't let one significantly outshine the other.
Syncing Audio and Video: Ensure your audio is perfectly synced with your video. Delayed audio can be confusing and give a poor impression.
5. Monitor Audio Levels
Too loud or too soft audio levels can make your audition difficult to watch. Audio that's too quiet may force the viewer to strain to hear you, while audio that's too loud can be unpleasant or distort your voice.
Solutions:
Use an Audio Meter: Many cameras and recording devices have built-in audio meters. Use them to monitor your levels during a test recording.
Adjust Levels Post-Recording: If possible, use editing software to adjust the audio levels of your recording to ensure they're consistent and clear.
*FOR MUSICAL AUDITIONS: You should play the music on a separate device and it needs to be placed away from the device you're recording on. Don't put it next to the camera as it will override your sound.
By addressing these common audio pitfalls, you can significantly improve the quality of your self-tape auditions. Clear, crisp audio not only showcases your vocal performance but also demonstrates your professionalism and attention to detail, making a positive impression on casting directors.
Visual Presentation: Looking Your Best in Self-Tape Auditions
In self-tape auditions, your visual presentation is just as crucial as your acting skills. The right wardrobe, makeup, framing, and body language can significantly enhance your performance, making you memorable to casting directors. Here's how to ensure you look your best and make a strong visual impact.
Wardrobe and Makeup Tips

Dress for the Part: Your clothing should reflect the character you're auditioning for, acting as an extension of your performance. If you're auditioning for a Disney Princess role, a nice dress might be appropriate. For more casual roles, something relaxed yet put-together can work well. However, avoid overly bold patterns or logos that can distract from your performance.
Tips:
Research Your Character: Understand the character's background and context to choose an outfit that resonates with their personality and lifestyle.
Keep It Simple: Solid colors work well on camera and help keep the focus on your performance. Choose colors that complement your skin tone and enhance your features.
Makeup Should Enhance, Not Distract: Makeup for camera work should look natural and understated. The goal is to enhance your features, not to create a look that draws attention away from your performance.
Tips:
Matte is Better: Avoid shiny or glittery makeup, as it can look distracting on camera. Use matte finishes to create a smooth, even complexion.
Define Your Features: Ensure your eyes, lips, and cheekbones are well-defined but not overdone. Subtlety is key to looking natural and authentic.
Framing and Body Language

Framing Yourself in the Shot: How you frame yourself can influence how your performance is perceived. A medium close-up (chest up) is standard for self-tape auditions, as it allows casting directors to see your facial expressions clearly while providing a sense of your body language.
Tips:
Center Yourself: Position yourself so that you're centered in the frame, with your eyes roughly two-thirds of the way up the screen. This creates a balanced and engaging shot.
Check Your Background: Ensure your background is neutral and clutter-free. A simple backdrop allows the focus to remain on you.
Master Your Body Language: Your body language speaks volumes about your character and emotion. Be mindful of your movements and gestures, ensuring they're in harmony with the character you're portraying.
Tips:
Practice in Front of a Mirror: This helps you become aware of any unconscious habits or gestures that might not translate well on camera.
Keep Movements Purposeful: Every gesture or movement should add to your character's story. Avoid fidgeting or unnecessary movements that could distract from your performance.
Conveying Emotion Through Body Language: Use your body to complement your verbal performance. Subtle changes in posture, gestures, and facial expressions can convey a wide range of emotions and add depth to your character.
Final Thoughts
Looking your best in a self-tape audition goes beyond physical appearance; it's about embodying the character fully and presenting yourself in a way that captures the essence of their story. By carefully selecting your wardrobe and makeup, framing yourself properly, and utilizing effective body language, you create a compelling visual presentation that supports your acting skills. Remember, in the competitive world of acting, details matter. Your attention to visual presentation can be the difference that makes you stand out in a sea of auditions.
Editing and Submitting Your Audition: A Guide to Getting Noticed
After pouring your heart and soul into your self-tape audition, the final steps of editing and submitting are crucial to ensuring your work is seen in the best possible light. This phase is about polishing your presentation and adhering to submission standards to maximize your chances of success. Here's how to navigate these final, vital steps with professionalism and care.
Basic Editing Techniques
Editing your self-tape doesn't require advanced skills or expensive software. With basic editing techniques, you can significantly improve the quality of your submission, ensuring it's concise, clear, and engaging.
Trimming Unnecessary Parts: Start by cutting out any dead air at the beginning or end of your recording, as well as any mistakes or unwanted takes. This keeps the focus on your best performance.
Adjusting Lighting and Sound Levels: If your video is too dark or the sound is uneven, use editing software to make adjustments. Increasing brightness or contrast can improve visibility, while audio adjustments can ensure your voice is clear and consistent throughout.
Maintain Authenticity: While it's tempting to edit heavily, remember that casting directors want to see the real you. Avoid over-editing; your performance should feel natural and genuine, not overly polished or artificial.
Tips:
Use Free Editing Tools: There are many free or affordable editing software options available that are user-friendly and sufficient for basic editing needs.
Watch Tutorials: If you're new to editing, online tutorials can be a great resource to learn simple techniques to enhance your audition.
Submission Guidelines
Paying close attention to the submission guidelines provided by casting directors is imperative. Failing to comply with these instructions can result in your audition being disregarded, regardless of the quality of your performance.
Correct Formats and File Sizes: Ensure your video file is in the requested format (e.g., MP4, MOV) and does not exceed the specified file size. Converting or compressing files may be necessary to meet these requirements.
Naming Your File Appropriately: Often, casting directors will specify how they want files named (usually including your name and the role). Follow this format closely to ensure your file is easily identifiable and doesn't get lost in the shuffle.
Submission Deadlines: Adhere to submission deadlines strictly. Late submissions are typically not considered and can reflect poorly on your professionalism.
Email or Upload Instructions: Whether you're asked to email your audition, upload it to a specific platform, or use a link, make sure you follow the instructions to the letter. Incorrect submission methods can lead to your audition not being reviewed.
Tips:
Read Instructions Carefully: Before submitting, double-check the submission guidelines to ensure you've followed all instructions.
Test Your Submission: If possible, send the file to yourself or a friend to ensure it opens and plays correctly on another device.
Include a Cover Note: If appropriate, include a brief, professional note with your submission, thanking the casting team for the opportunity and expressing your enthusiasm for the role.
Final Thoughts
The editing and submission process is your opportunity to put the final polish on your audition and present it in the most professional manner possible. By applying basic editing techniques to enhance your tape and meticulously following submission guidelines, you position yourself as a serious and professional candidate. Remember, in the competitive world of acting, attention to detail can make all the difference. Give this final step the care and attention it deserves, and you'll increase your chances of making a lasting impression.
Overcoming Common Challenges in Self-Tape Auditions

It's completely normal to feel nervous when recording a self-tape audition, but there are strategies to manage these feelings and deliver your best performance.
Self-tape auditions are a powerful tool for actors, offering the flexibility to audition from anywhere at any time. However, they come with their own set of challenges, from dealing with nerves to handling rejection. Here's how to navigate these hurdles and learn from those who've successfully navigated the self-tape landscape.
Dealing with Nerves
It's completely normal to feel nervous when recording a self-tape audition. The pressure to deliver a perfect take can be overwhelming, but there are strategies to manage these feelings and deliver your best performance.
Practice Relaxation Techniques: Before you hit record, take a few moments to practice deep breathing, meditation, or any relaxation technique that works for you. This can help calm your nerves and focus your mind on the task at hand.
Embrace the Advantages of Self-Taping: Remember, one of the greatest benefits of self-taping is the ability to redo your performance until you're satisfied. If a take doesn't go as planned, take a break, review what could be improved, and try again. This process is a learning experience in itself.
Handling Rejection
Rejection is an inevitable part of the acting profession. Not every audition will result in a role, but each one is a stepping stone in your career.
View Each Audition as a Learning Experience: Instead of dwelling on the disappointment, try to extract valuable lessons from each rejection. Whether it's improving your lighting setup, honing your emotional expression, or tweaking your audio settings, every audition offers insights that can enhance your future performances.
Stay Positive and Persistent: Maintaining a positive outlook is crucial. Rejection is not a reflection of your worth as an actor but rather a part of the process. Keep refining your skills, and remember that persistence is key to success in this industry.
Success Stories: Learning from the Best
The path to success is often paved with inspiration and advice from those who've achieved their goals. Many actors have landed significant roles through self-tape auditions, and their journeys offer valuable lessons.
Inspirational Stories: Research actors who've successfully used self-tapes to land roles and study their techniques. Their stories can provide motivation and a blueprint for what works. Pay attention to their setup, performance style, and how they convey emotion through the camera.
Tips from Industry Professionals: Seek out advice from casting directors and experienced actors. They can offer insights into the dos and don'ts of self-taping, from technical tips to performance strategies. Many professionals share their knowledge through workshops, interviews, and social media.
Summary and Key Takeaways
Self-tape auditions are changing the landscape of the acting world, providing actors with unprecedented opportunities. By focusing on quality, authenticity, and mastering the technical aspects of self-taping, you can create auditions that stand out. Remember to:
Manage nerves with relaxation techniques.
View rejection as a learning opportunity.
Draw inspiration from successful actors.
Seek advice from industry professionals.
Next Steps in Your Acting Career
Mastering self-tape auditions is just one part of building a successful acting career. Continue to train, hone your craft, and expand your network within the industry. Stay updated on the latest trends in self-taping and acting, and always be on the lookout for new opportunities to showcase your talent. The journey of an actor is one of continuous learning and growth—embrace it with open arms and a resilient spirit.
Frequently Asked Questions About Self-Tape Auditions:
What equipment do I need for a professional-looking self-tape?
How can I improve my acting skills for the camera?
What are some common mistakes to avoid in self-tape auditions?
How do I handle technical issues during recording?
Can self-tape auditions lead to significant roles?
What is the best way to receive feedback on my self-tape?
Conclusion
Conclusion: Embracing the Future of Self-Tape Auditions
The landscape of the acting world is evolving, and at the heart of this transformation are self-tape auditions. Once considered a temporary solution or a secondary option, self-taping has burgeoned into a fundamental aspect of the casting process. Its convenience, efficiency, and the democratization of opportunities for actors globally underscore its staying power. As we look towards the future, it's clear that self-tape auditions will not only persist but flourish, reshaping how actors connect with opportunities and how casting directors discover talent.
The Enduring Impact of Self-Tape Auditions
Increased Accessibility: Self-tape auditions break down geographical barriers, allowing actors from any location to audition for roles worldwide. This global accessibility enriches the talent pool, giving casting directors access to a diverse array of talent and offering actors opportunities they might not have had otherwise.
Flexibility and Convenience: The ability to audition from the comfort of one's home and on one's schedule is a game-changer. This flexibility benefits both actors, who can craft their best performance without the pressure of a live audition, and casting directors, who can review submissions at their convenience.
Technological Advancements: As technology continues to advance, the quality and ease of self-taping are only going to improve. Enhanced video and audio capabilities, editing software, and file-sharing platforms will make self-tape auditions more accessible and efficient.
Evolving Casting Processes: Casting directors and production teams are adapting to and embracing the self-tape audition format. This adaptation is leading to more streamlined and efficient casting processes, where initial rounds of auditions are conducted virtually, saving time and resources for both the production teams and the actors.
Preparing for the Future
For actors, staying ahead in this evolving landscape means embracing the self-tape audition format and honing the skills necessary to stand out. It involves investing in the right equipment, understanding the technical aspects of filming and editing, and continuously working on acting skills to deliver compelling performances.
Moreover, actors must remain adaptable, ready to leverage new technologies and platforms that facilitate self-taping. Building a digital presence and network can also play a crucial role in discovering opportunities and connecting with industry professionals.
Final Thoughts
The rise of self-tape auditions is a testament to the resilience and adaptability of the entertainment industry. As we move forward, the importance of self-taping is only set to increase, making it an indispensable tool in an actor's arsenal. By embracing this trend, actors can seize a world of opportunities, transcending traditional boundaries and showcasing their talent on a global stage.
In conclusion, the future of self-tape auditions is bright, promising a more inclusive, efficient, and dynamic casting process. For aspiring and established actors alike, mastering the art of the self-tape audition is not just a skill—it's a strategic move towards a successful career in an ever-evolving industry.